Car detailing at home can be a rewarding way to keep your vehicle clean, protected, and looking its best without visiting a professional detailer every time. With the right products, tools, and techniques, beginners can handle many routine detailing tasks, from washing the exterior and cleaning wheels to refreshing the interior, caring for leather, and maintaining the paintwork.
The most important part of DIY detailing isn’t having the biggest collection of products. It’s learning how to use the right product, tool, and technique for each surface while avoiding methods that can cause scratches, stains, or premature wear. A careful, methodical approach can make a significant difference to the final result.
Start With the Right Detailing Equipment
Before beginning your first DIY detailing session, gather the basic equipment you need. A good starting kit can include quality microfiber towels, a wash mitt, automotive shampoo, buckets, wheel brushes, tire cleaner, glass cleaner, interior cleaner, drying towels, and suitable detailing brushes.
You don’t need dozens of specialized products to get started. A small collection of quality, purpose-designed products is generally more useful than buying multiple products that perform the same task.
Keep your cleaning tools separated according to their purpose. Towels and brushes used on wheels and tires should not be reused on painted body panels because they can carry abrasive brake dust and road contaminants.
Wash the Vehicle From Top to Bottom
The correct washing technique is one of the most important parts of DIY detailing. Begin with the least contaminated areas of the vehicle and work toward the dirtiest sections.
Start with the roof and upper panels before moving toward the lower doors, bumpers, wheels, and tires. These lower areas usually contain more road grime and contaminants.
Use plenty of lubrication and avoid aggressively scrubbing the paint. Allow the cleaning solution to loosen dirt before gently washing the surface. Working systematically helps reduce the possibility of dragging abrasive particles across the paint.
Use a Two-Bucket Washing Method
A two-bucket wash can help separate the cleaning solution from the dirt removed from the vehicle. One bucket contains your shampoo solution, while the other is used for rinsing the wash mitt.
After cleaning one section, rinse the mitt before returning it to the shampoo bucket. This helps remove dirt and reduces the amount of contamination being transferred back onto the vehicle.
For beginners, this simple technique can make a noticeable difference in maintaining the condition of the paint during routine washing.
Clean the Wheels Before the Body
Wheels and tires collect some of the toughest contamination on a vehicle, including brake dust, mud, road film, and grease. Cleaning them separately helps prevent this contamination from being transferred onto freshly washed paint.
Use dedicated wheel and tire products that are appropriate for the specific finish. A soft wheel brush can help reach difficult areas, while a separate tire brush can remove grime from the rubber.
Never assume that one wheel cleaner is safe for every wheel finish. Painted, polished, chrome, powder-coated, and specialty wheels can have different care requirements.


Pay Attention to the Tires
Clean tires can dramatically improve the overall appearance of a freshly detailed vehicle. Begin by removing loose dirt before applying an appropriate tire cleaner.
Agitate the surface with a dedicated tire brush and rinse thoroughly. Once dry, you can apply a suitable tire dressing if desired.
Avoid excessive product that leaves the tire extremely greasy or causes unwanted sling onto the vehicle’s bodywork.
Clean the Interior Systematically
Interior detailing becomes much easier when you work from the top down. Start with the dashboard and upper surfaces before moving toward the lower sections, seats, carpets, and floor areas.
Use a detailing brush to loosen dust from air vents, buttons, seams, and other difficult areas. Follow this with an appropriate microfiber towel and interior cleaner.
Don’t soak electronic controls, switches, screens, or sensitive materials. Apply products carefully and follow the manufacturer’s instructions for the specific surface.
Give Your Leather Seats Proper Care
Leather requires different treatment from plastic or fabric. Begin by gently removing loose dust and debris before applying a leather-safe cleaner.
Use a soft brush or microfiber towel to work the product into the surface without excessive scrubbing. After cleaning, an appropriate leather conditioner or protectant may help maintain the material’s appearance and feel.
Always check whether the seats are genuine leather, coated leather, synthetic leather, or another material before choosing a product.
Great detailing isn’t about rushing through the cleaning process; it’s about using the right technique and giving every surface the attention it deserves.
Gideon Robertson
Clean Your Windows Without Streaks
Clean glass improves both appearance and visibility. Use an automotive glass cleaner and a dedicated glass microfiber towel.
Spray the product appropriately rather than flooding the glass or surrounding dashboard. Work in manageable sections and use a clean, dry side of the towel for the final wipe.
If you’re cleaning the inside of the windshield, remember that oils from hands, dashboard materials, and interior products can create a hazy film that becomes particularly noticeable when driving toward sunlight.
Protect the Paint After Washing
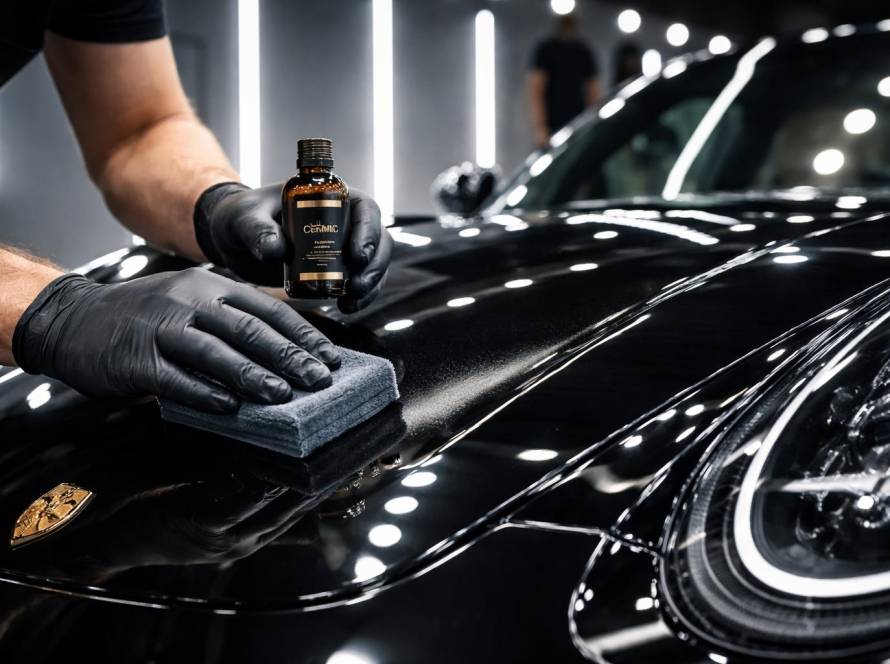
Once your vehicle is clean, consider adding a layer of protection. Depending on your preference and budget, this could include a spray sealant, wax, ceramic maintenance product, or another paint-protection solution.
Protection can help improve gloss and make future cleaning easier. However, always ensure the paint is clean and properly prepared before applying the selected product.
If the vehicle already has ceramic coating, follow the coating manufacturer’s recommended maintenance products rather than applying incompatible products.
Learn the Difference Between Cleaning and Polishing
Beginners often assume that polishing is simply another form of washing. It isn’t.
Cleaning removes dirt and contamination from the surface, while polishing is intended to refine the paint and reduce the appearance of certain defects such as light swirls and surface imperfections.
Polishing requires more care because incorrect machine settings, unsuitable pads, aggressive compounds, or excessive pressure can damage the paint.
If you’re completely new to paint correction, it’s better to practice carefully and learn the fundamentals before attempting aggressive correction work.
Use Microfiber Towels Correctly
Microfiber towels are among the most useful tools in detailing, but they should be selected and maintained properly.
Use different towels for different tasks. For example, designate separate towels for paint, glass, wheels, tires, and interior surfaces.
Wash detailing towels separately from heavily soiled household laundry and avoid using products that can reduce microfiber performance. Inspect towels regularly and retire any that have become heavily contaminated or damaged.

Avoid Common DIY Detailing Mistakes
Beginners can easily make mistakes that reduce the quality of the final result. Some common problems include using household dish soap, washing in direct sunlight, using one dirty towel for the entire vehicle, applying too much product, using unsuitable chemicals, or aggressively scrubbing contaminated paint.
Another common mistake is trying to clean everything with the same product. Automotive surfaces are different, and a product designed for tires may not be appropriate for leather, glass, or painted trim.
Taking a few extra minutes to read product instructions can prevent unnecessary damage.
Create a Simple Detailing Routine
You don’t need to perform a complete detail every weekend. A practical maintenance routine can help keep the vehicle looking good between deeper detailing sessions.
A simple routine could include:
- Regular exterior washing
- Wheel and tire cleaning
- Interior vacuuming
- Dashboard and trim cleaning
- Glass cleaning
- Periodic paint protection
- Occasional deeper interior detailing
The frequency depends on how often you drive, where the vehicle is parked, weather conditions, and the level of contamination it encounters.
Professional Detailing Support From HyVicMotors
At HyVicMotors, we believe every vehicle deserves proper care, whether you’re maintaining it at home or looking for professional detailing support.
Our services can cover car washing, tire cleaning, rim cleaning, interior finishes, leather care, paint correction, headlight care, ceramic coating, polishing, conditioning, and comprehensive vehicle detailing.
If you’re unsure which products or techniques are appropriate for your vehicle, professional advice can help you avoid costly mistakes and achieve a better finish.
DIY car detailing doesn’t have to be complicated. Start with the fundamentals: use quality automotive products, keep your tools clean, separate towels by task, wash systematically, avoid aggressive scrubbing, and always choose products according to the surface you’re treating.
As your experience grows, you can gradually introduce more advanced techniques such as paint decontamination, machine polishing, paint protection, ceramic coating maintenance, and deeper interior restoration.
The goal isn’t simply to make your car look clean for one day. It’s to develop a consistent vehicle-care routine that protects the surfaces, preserves the finish, and keeps your car looking its best for longer.
At HyVicMotors, we’re always ready to help when a detailing job goes beyond what you can comfortably handle at home.